Tip. Want a hand? The Bill&Go team can help you set up and walk your staff through their first shift. Talk to us.
1.2What you need at the counter
The tablet or computer for the POS, the printers, and the computer or box that prints to them.
Bill&Go runs on what most shops already have. You need three things:
A POS. Any computer or tablet with a web browser, at pos.billandgo.app, or the Bill&Go POS app: on the App Store for iPad and iPhone, and coming to Google Play for Android (Sunmi POS devices included).
Printers. Receipt and kitchen printers on your shop’s network (wifi or cable), or plugged in by USB to a Printing Core box. A sticker printer if you put stickers on cups.
Something that prints. The free Bill&Go Printing app on a Windows or Mac computer that stays on in the shop, a Bill&Go Printing Core box, or the POS app itself on a tablet or a Sunmi POS device. The POS sends every ticket there, so no print dialog ever opens.
An internet connection is needed: the POS, the kitchen and the console all read the same orders. The POS app keeps taking orders and cash for a while if the connection drops, and sends them when it is back.
Tip. Not sure your printers will work? Talk to us with their make and model before you buy anything new.
1.3Create your shop
Make your Bill&Go account and your shop in a minute, with a month of Pro free and no card.
Who
The owner
Where
console.billandgo.app/signup
Your shop is made by its owner, once. Everyone else is added by you later, so only the owner signs up.
Open Get Started on billandgo.app, or go to console.billandgo.app/signup.
Type your Shop name, Your name and Email. Phone (optional) starts with + and the country code, like +85512345678.
Choose a Password. The meter under it must say Fair or better, and it cannot be your shop’s name or your own name.
Press Create your shop.
You land on Stores with a new store ready to fill in. Add your first store: nothing takes orders until a store exists.
Tip. Every new shop gets one month of Pro free, with no card. After it, choose a plan or stay on Free; nothing you added is taken away.
Good to know. If the email already has a Bill&Go account, you are asked to Sign in instead. One email signs in to one shop.
1.4Sign in to the console and the POS
Where to sign in, with an email or a username and business code, and what to do when a password is forgotten.
Who
Everyone on the team
Where
console.billandgo.app (the console) and pos.billandgo.app (the POS)
Bill&Go has two places on the web. The console (console.billandgo.app) is where the owner and managers set up the shop and see reports. The POS (pos.billandgo.app) is where orders are taken at the counter. The same account opens both; Switch to POS and Switch to Dashboard move between them.
Type your email, or the username the owner gave you, in Email or username (Username or email on the POS).
With a username, a Business code field appears. Type the code the owner gave you; the computer remembers it.
Type your Password and press Sign in.
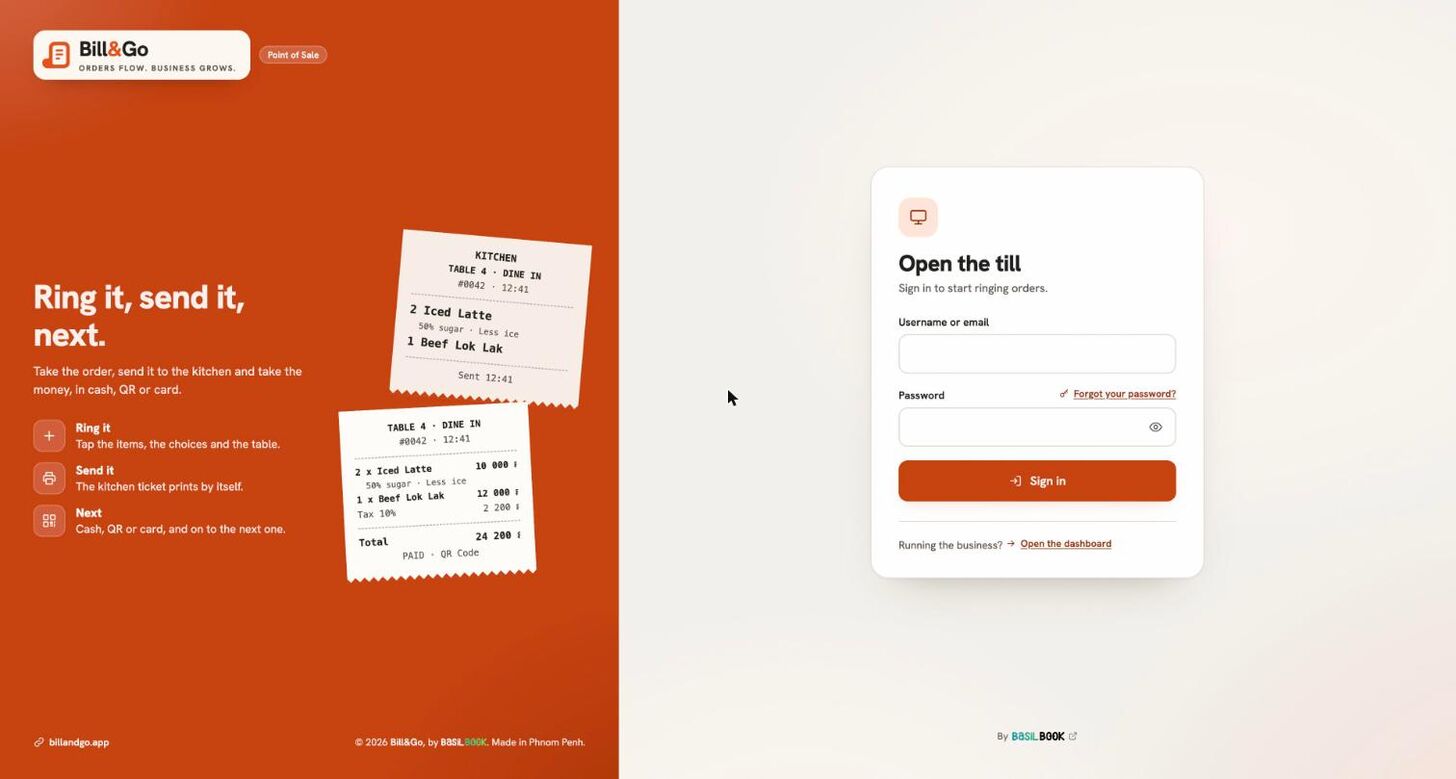
Signing in to the POS. The console’s sign-in looks the same.Full size
If your Google account uses the same email as your Bill&Go account, Continue with Google signs you in without a password. Google never makes a new shop.
Forgot your password?
Press Forgot your password? beside the password field.
Type your Email and press Email me a link.
Open the email, then type your new password in New password and Type it again, and press Set password. You are signed out everywhere else.
Good to know. People who sign in with a username only, without an email, cannot reset by email. Ask the owner or a manager to set a new password for you.
Choosing your own password
If the owner gave you your password, the first sign-in asks you to choose your own. Type the Password you were given, your New password twice, then press Set my password.
1.5Add a store
Add a branch with its address, tax, delivery fee and opening hours.
Who
Owner and managers
Where
Console → Stores → New store
Open Stores and press New store.
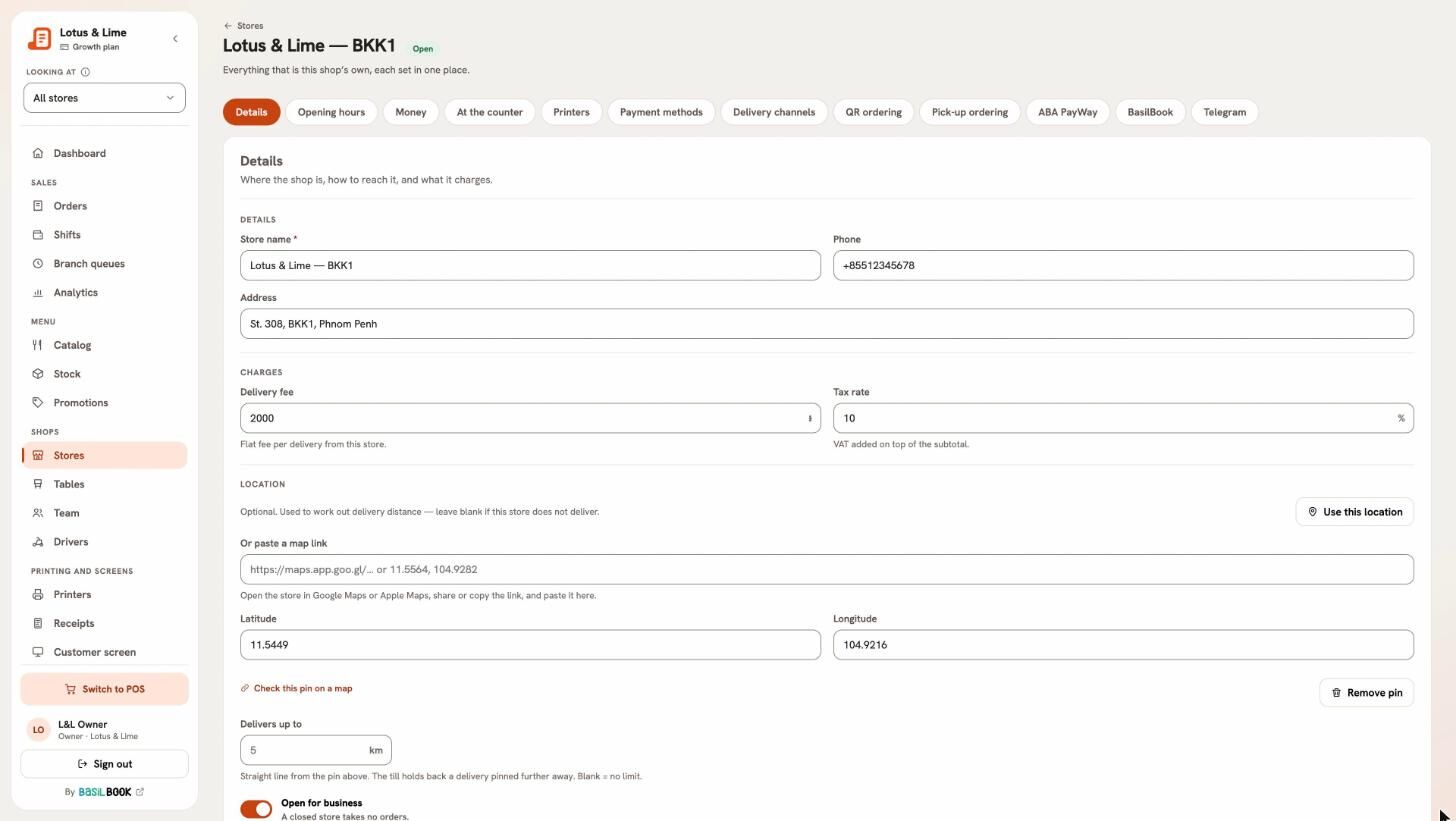
Under Details, type the Store name, Phone and Address.
Under Charges, set the Delivery fee and the Tax rate added on top of the subtotal.
Under Location, press Use this location, or paste a Google Maps or Apple Maps link. Delivers up to limits how far you deliver.
Set the Opening hours.
With another store already, Print like copies its bill, kitchen ticket and sticker templates.
Leave Open for business on and press Add store.
A store’s page: Details first, then every setting it keeps for itself.Full size
A new store starts with your company’s money settings; change them on its own page.
Good to know. Your plan sets how many stores you can have. A manager who adds a store works there.
1.6A store’s own settings
Every branch keeps its own money, counter, printing, payment and ordering settings.
Who
Owner and managers (Money, At the counter and connections: owner only)
Where
Console → Stores → the store’s Settings
Open Stores and press Settings on a store. Each tab is that store’s alone:
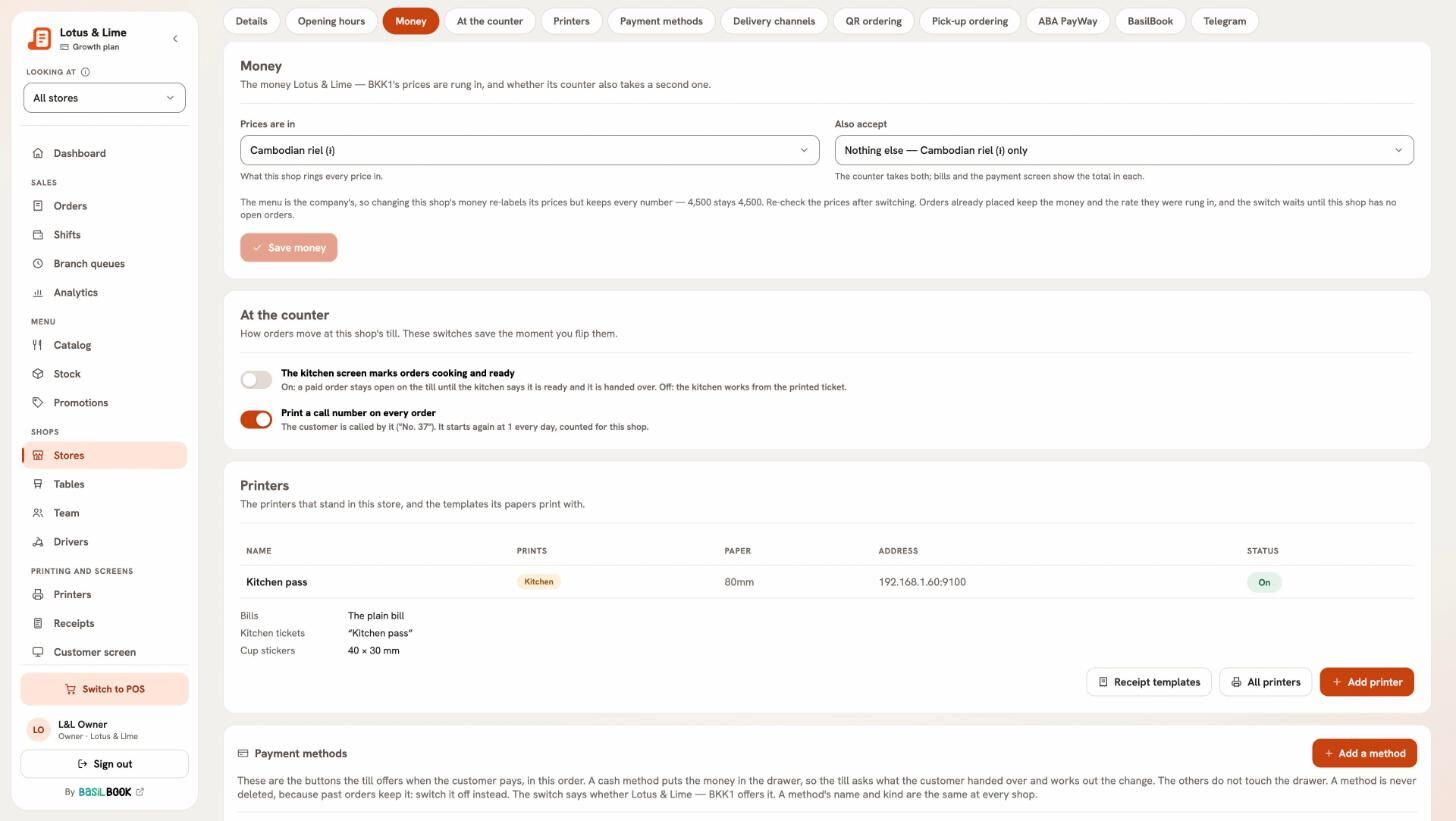
At the counter: The kitchen screen marks orders cooking and ready, and Print a call number on every order. These switches save the moment you flip them.
Printers, Payment methods and Delivery channels.
QR ordering and Pick-up ordering.
ABA PayWay, BasilBook and Telegram.
Every POS, receipt and report reads the settings of the store the order was taken at.
1.7Multi-currency: money and exchange rate
Choose the money your prices are in, a second money to accept, and your own rate.
Who
The owner
Where
Console → Stores → the store → Money
Open the store’s Money tab.
Choose what Prices are in, like US dollars.
In Also accept, choose the second money, like riel, or Nothing else.
Type the Exchange rate as 1 dollar = 4,100 riel, or press the flip button to say it the other way round.
Press Save money.
Money, and the At the counter switches below it.Full size
The POS takes both monies in one payment and gives change in either. The shift is counted per money.
Good to know. Each order keeps the rate it was placed at, so changing the rate never changes an old receipt.
1.8Add tables
Add the tables in each store so the POS can seat dine-in orders.
Who
Owner and managers
Where
Console → Tables → New table
Open Tables and press New table.
Choose the Store, type the Name (T1, Terrace 2, Bar) and the number of Seats.
Set its place in Order on the till, and add it.
At the POS, Dine in asks Which table? and shows which tables are seated and how much is on them.
Good to know. A table stays in its store. To move it, add it at the other store and remove the old one.
1.9Add a person to your team
Give a manager or staff member their role, the stores they work at, and how they sign in.
Who
Owner and managers
Where
Console → Team → Add person
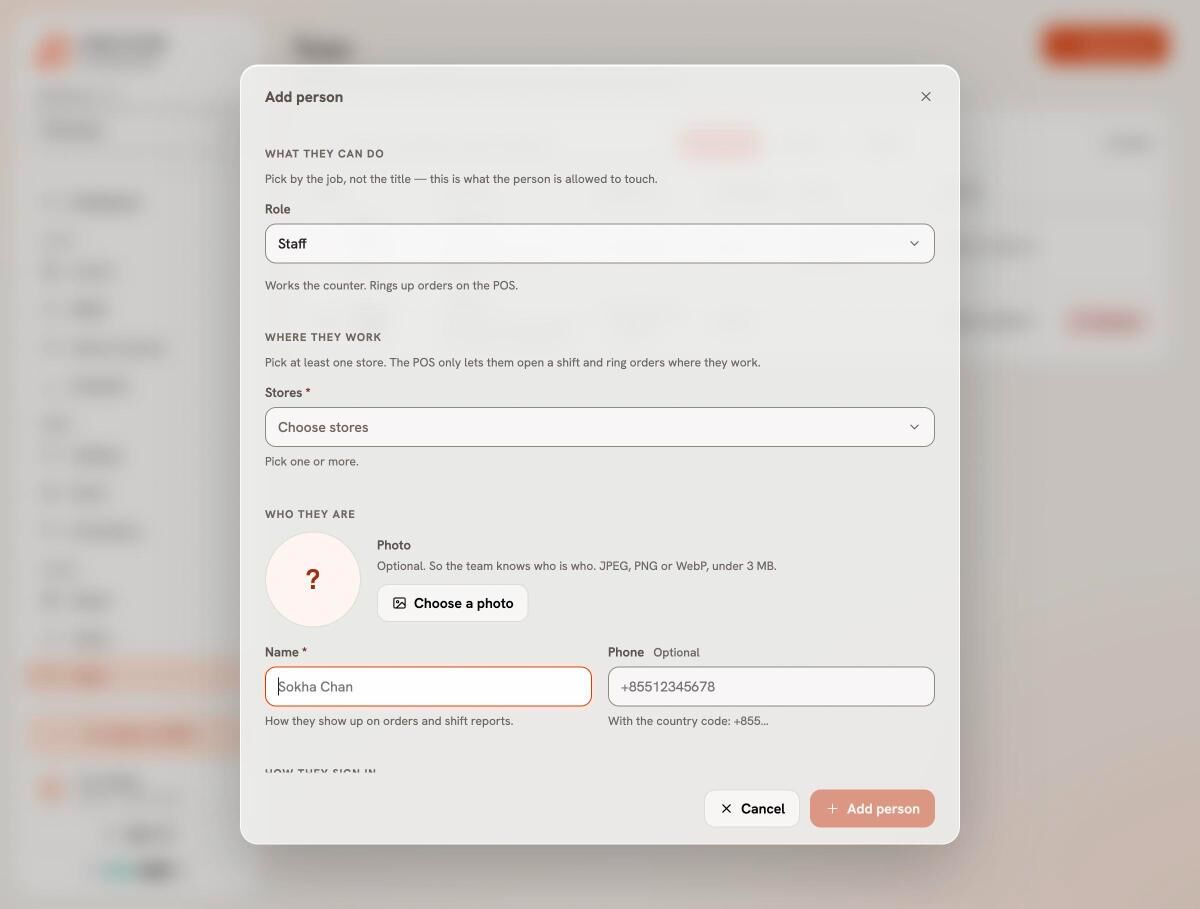
Open Team and press Add person.
Under What they can do, pick the Role: Manager, Staff or Driver.
Under Where they work, pick the Stores. With one store this is done for you.
Add a photo, their Name and Phone.
Under How they sign in, give a Username (lowercase, no spaces) and a Password. Leave the password empty and add an Email to send them an invite instead.
Leave Ask them to choose their own password on, and press Add person.
Adding a person: role first, then where they work.Full size
Give them the username, the password and your Business code (in Settings → Business). They sign in at the POS.
Roles
Owner — everything, billing included. There is one, and it never changes.
Manager — runs the shop: orders, refunds, the menu and the people.
Staff — works the counter and rings up orders.
Driver — takes deliveries.
Good to know. A manager or staff member with no store cannot use any POS until someone picks where they work.
1.10Your business name, logo and time zone
Change what belongs to the whole company: its name, logo, time zone and business code.
Who
The owner
Where
Console → Settings → Business
Name — your business name, on the apps and receipts.
Business code — what staff type when they sign in with a username. It never changes.
Time zone — every clock in Bill&Go follows it: the shop day, call numbers, reports and quiet hours.
Logo — up to 2 MB. It shows in the apps and on receipts whose template has Logo on.
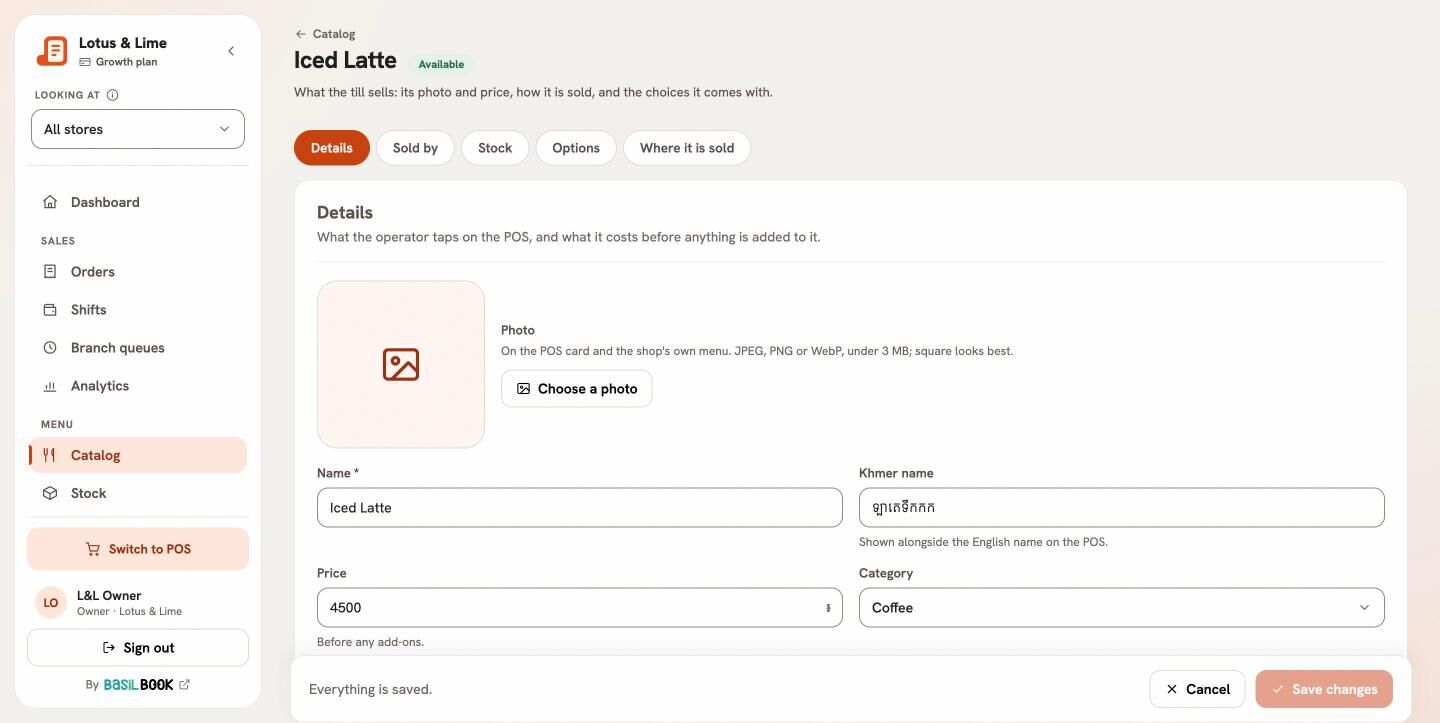
Turn Available off. A hidden product does not appear on the POS, but keeps its sales history. Turn it back on when it is back.
Sold by the can, bottle or pack
On Sold by, say what One is called (Can, Bottle…) and add packs with How many and their Price, like a six-pack. The POS asks which when it is added.
Good to know. A product has one price for every store. A store can only narrow what it sells, not change the price.
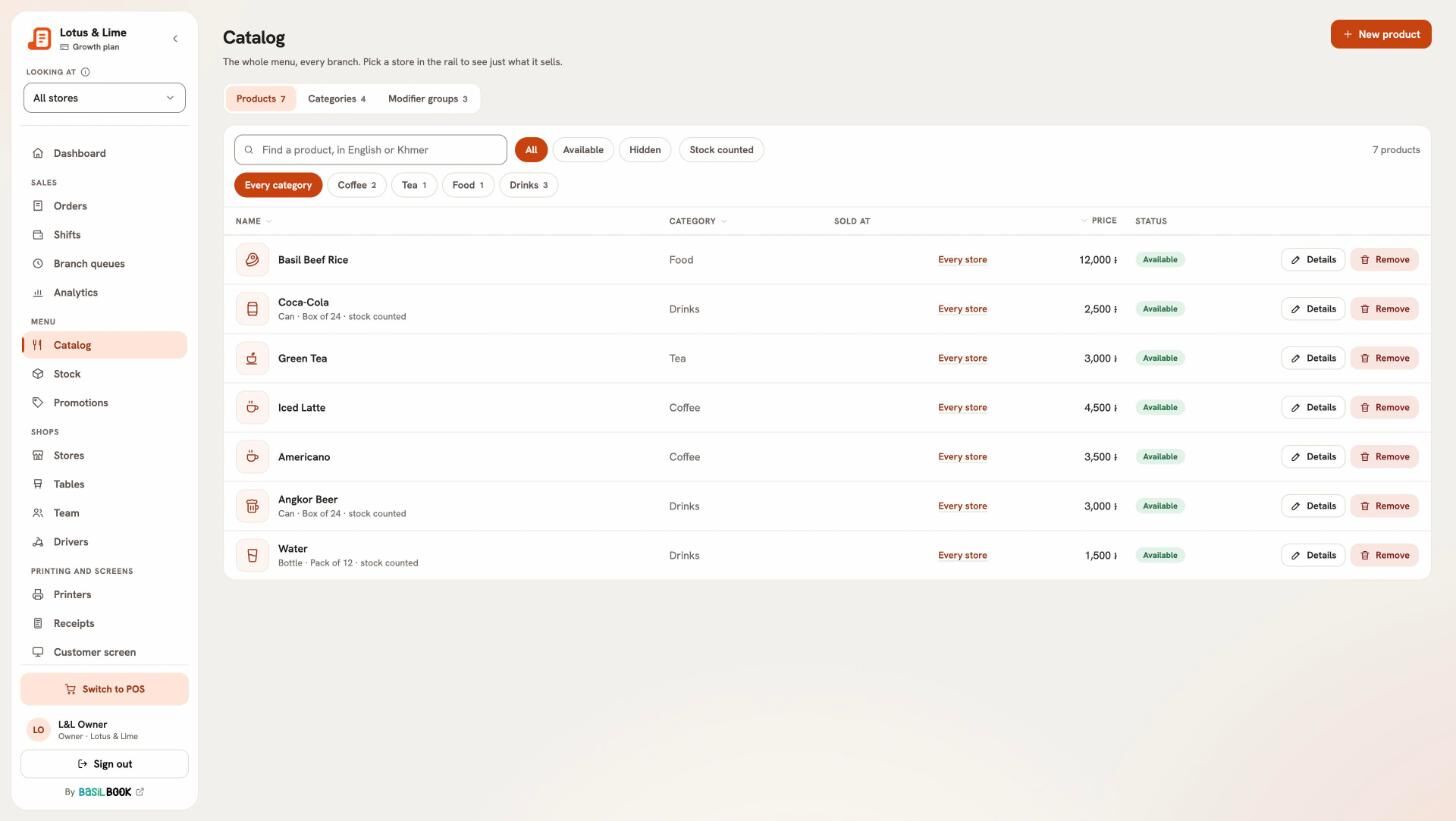
Tip. Find products quickly with the search: it reads English and Khmer names.
1.13Choices: sugar, ice, sizes and add-ons
Make a modifier group, like Sugar level, with its options, extra charges and how many can be picked.
Who
Owner and managers
Where
Console → Catalog → Modifier groups → New group
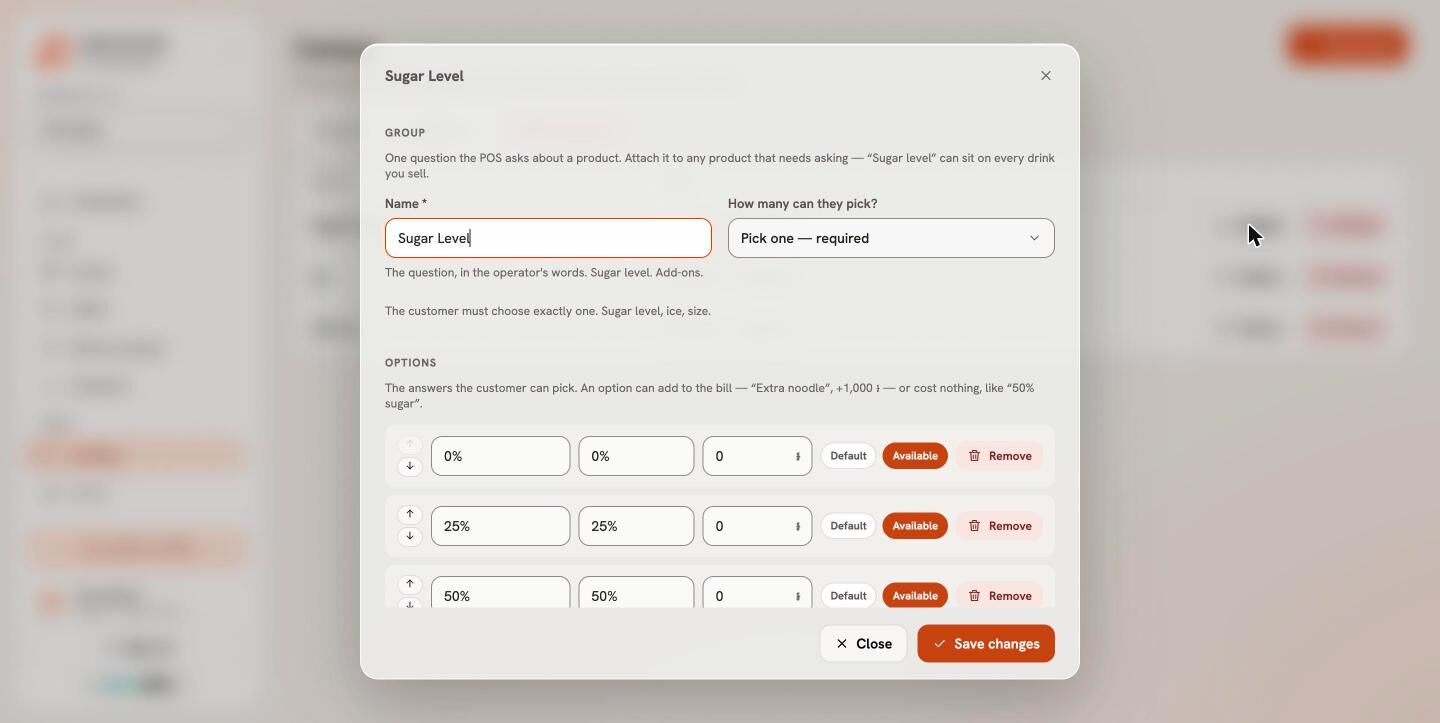
Open Catalog, the Modifier groups tab, and press New group.
Type the Name as the question, like “Sugar level”.
Choose How many can they pick?: Pick one — required, Pick one — optional, Pick any — optional, or Custom with a Minimum and Maximum.
Under Options, type each Option name, its Khmer name and any Extra charge (it can be less than zero, for a smaller size). Press Add option for the next one.
Press Add group, then add the group to products on their Options tab.
At the POS, the usual choice is already picked, so a normal order is one tap. A required group must be answered before the item is added, and Bill&Go checks the rules again when the order is placed.
1.14Khmer names on the POS and on paper
Give products, categories and choices Khmer names, and print them for the kitchen or on the bill.
Who
Owner and managers
Products, categories, choices and promotions each have a Khmer name field next to the English one. The POS’s search reads both.
For the cooks, switch on Khmer names in the kitchen ticket template.
For customers, switch on Khmer names in The items of the bill template.
A product can have two codes, both optional. The Barcode is the code printed on the package: the usual codes on packaged goods (EAN-13, EAN-8, UPC-A) and Code 128, digits and letters. The SKU is your shop’s own code for it, like LATTE-ICED-L: letters, digits and dashes. Letters are kept in capitals.
Give a product its codes
In the console, open Catalog and the product.
In Barcode, type the number under the bars. With a scanner plugged into the computer, click in the box and scan the product instead.
In SKU, type your own code if you use one.
Press Save changes.
A pack has its own codes, like the barcode on a box of 24: type them next to the pack on Sold by.
In the Bill&Go Console app, open the product and press Scan next to Barcode to read it with the camera. Type the SKU yourself.
Good to know. Each barcode and each SKU belongs to one product or pack in your shop. If another already has it, Bill&Go says which, so you can take it off there first.
Tip. The search on Catalog finds a product by name, barcode or SKU: scan or type it into the search box.
Scan at the POS
A USB or Bluetooth barcode scanner needs no set-up: it types like a keyboard and ends with Enter. Plug it in or pair it, and scan. The POS looks for the code as a barcode first, then as an SKU, so a label you print with your SKU scans too.
On the web POS, scan while the cursor is not in a text box. If you were typing a note, click on the menu first.
In the Bill&Go POS app, a paired scanner works the same way. Or press Scan and hold the code up to the camera.
The product is added just as if you had tapped it. If it has choices to make, like a size, they open first. Scan a pack’s code and the pack is added.
If nothing in this store has the code, the POS says No product has this code with the code it read. Check the product’s codes in the console, or whether the product is sold at this store.
Still stuck?
Tell the Bill&Go team in Phnom Penh what you were trying to do, and we'll walk you through it.