


Use an iPad or iPhone at the counter with a USB-C hub
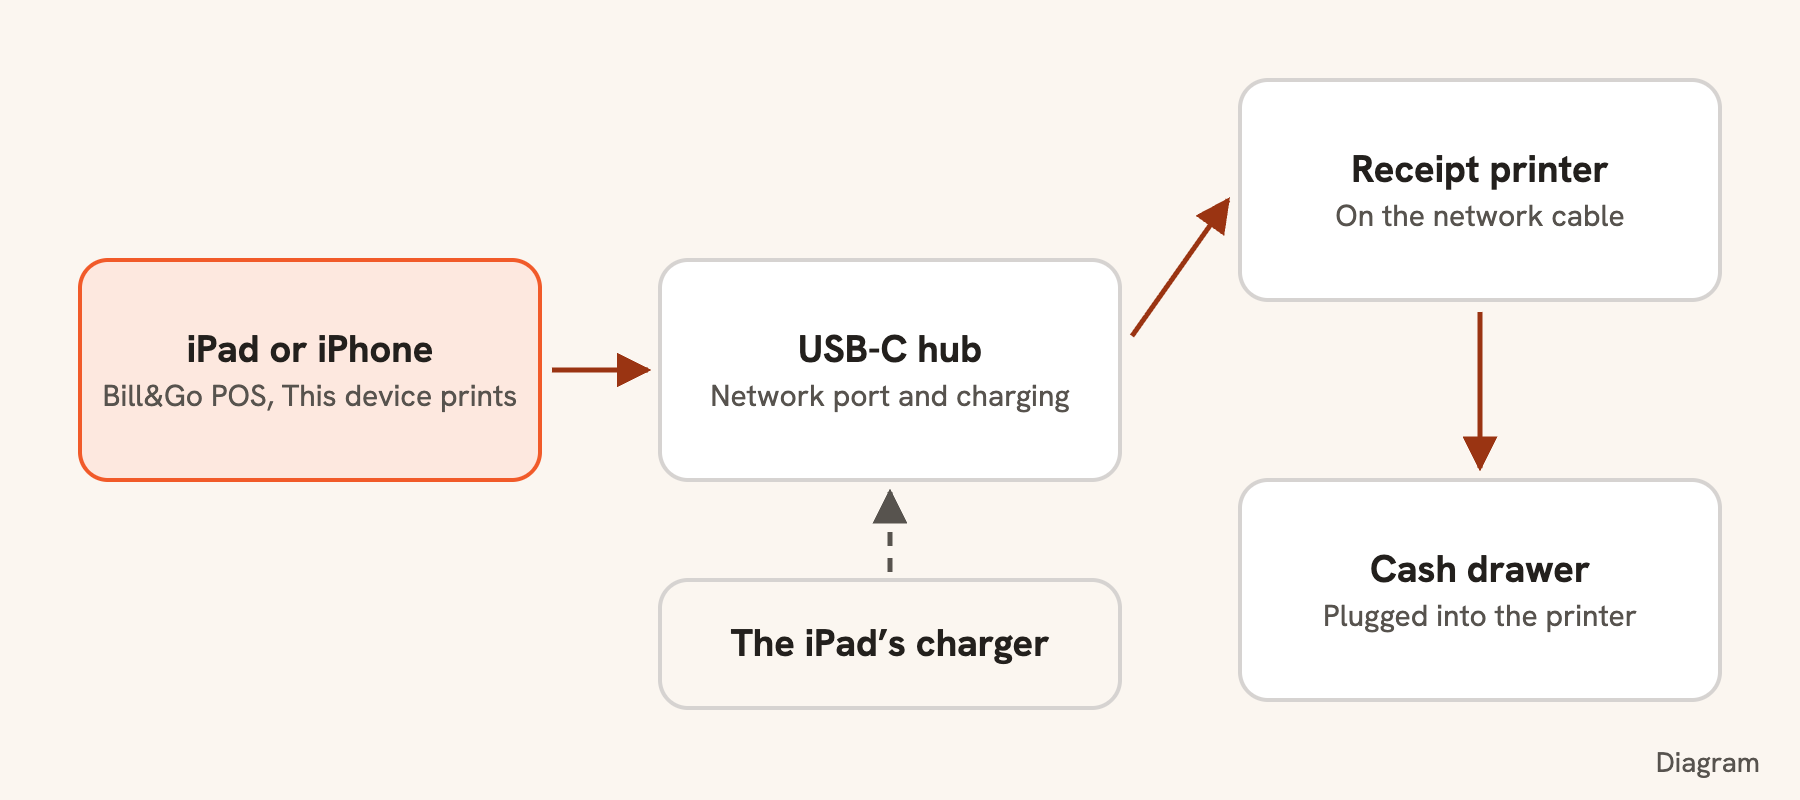
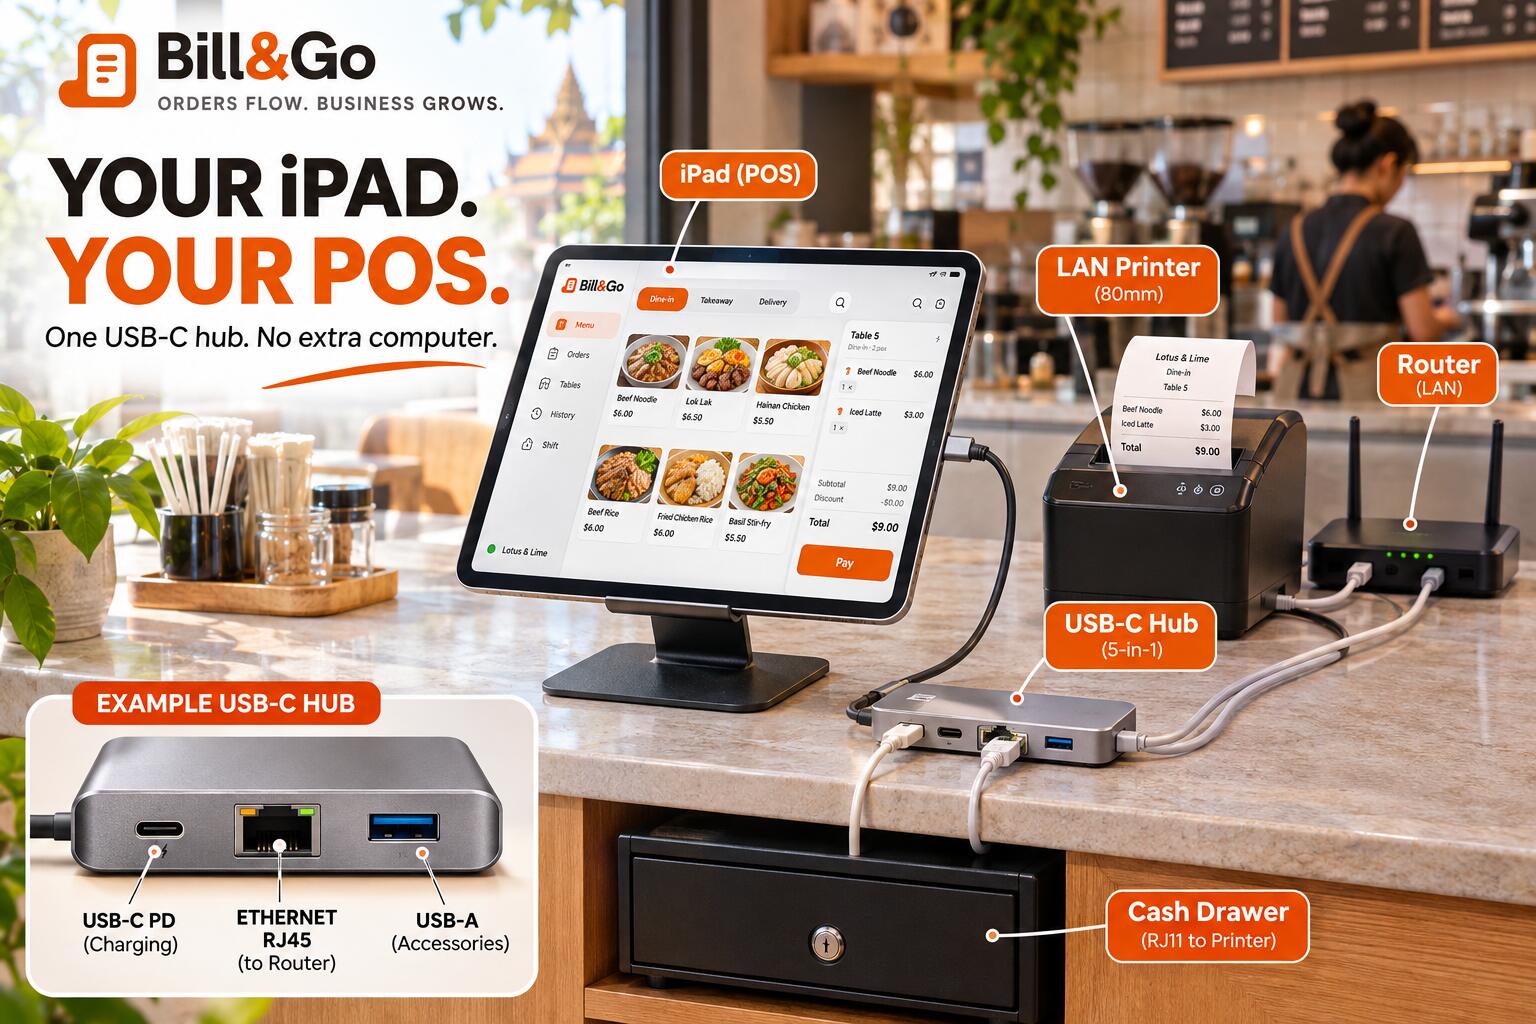
An iPad or a USB-C iPhone on a stand, a hub with a network port and charging, a network receipt printer and a cash drawer: no computer or box needed.
- Who
- Owner and managers set it up
- Where
- POS app → Settings → This device prints; Console → Printers
Many counters are an iPad on a stand with a receipt printer beside it and a cash drawer underneath. With a USB-C hub, the iPad reaches the printer by cable and charges all day, and the Bill&Go POS app does the printing itself: no printing computer or box.
What you need
- An iPad with a USB-C port, or an iPhone 15 or later, with the Bill&Go POS app.
- A USB-C hub with a network port (Ethernet, RJ45) and USB-C power pass-through, so the iPad charges while it works.
- A receipt printer with a network (LAN) port. Most 80mm receipt printers have one.
- A network cable, and a cash drawer if you take cash.
Good to know. A printer with only a USB cable cannot print from an iPad or iPhone: iOS does not let an app send to it. Choose one with a LAN port, or plug a USB printer into a Printing Core box.
Where to buy a hub in Phnom Penh
Two hubs on sale in Phnom Penh, at the prices listed in November 2026:
- UGREEN 7-in-1 Uno Series USB-C hub, $30 at Home Gears: a USB-C plug, a network port and USB-C charging up to 100W. Everything this counter needs.
- UGREEN 60554, USB 3.0 to 3 × USB 3.0 + RJ45, $18 at CC Computer: a gigabit network port, but a USB-A plug and no charging port. An iPad needs a USB-C to USB-A adapter for it, and does not charge while it is plugged in.
Plug it in
- Plug the hub into the iPad, and the iPad’s charger into the hub’s power port.
- Run a network cable from the hub to your router, and plug the printer into the router too.
- Plug the cash drawer into the printer’s drawer port, the small RJ11 socket at the back.
- Switch the printer on while holding its feed button: it prints a self-test page with its IP address.
On the iPad, Settings now shows Ethernet: the cable is working.
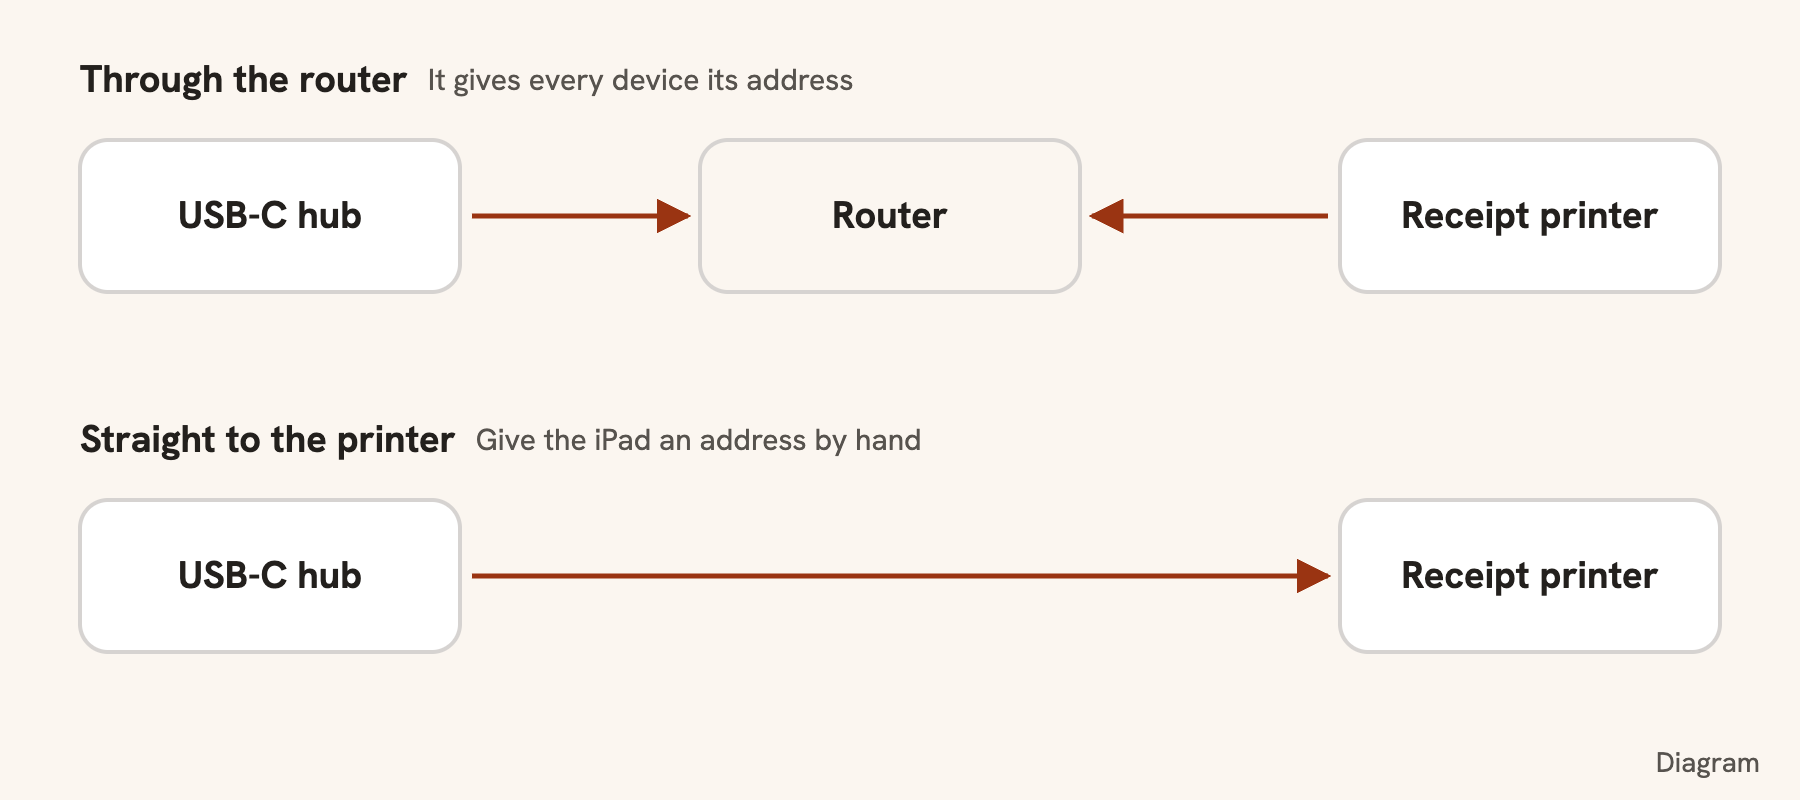
Through the router, the iPad reaches every printer on the shop’s network, not just the one beside it: the bill at the counter, and the kitchen and bar tickets on their own printers, all from the same iPad. Straight to the printer, it reaches only that one.
Cable straight to the printer, with no router
The cable can also go from the hub straight into the printer. Nothing hands out addresses on that cable, so give the iPad one by hand:
- On the iPad, open Settings → Ethernet, tap the hub, then Configure IP, and choose Manual.
- Type an address on the printer’s network. If the printer is 192.168.1.87, type 192.168.1.50, with Subnet Mask 255.255.255.0.
- Leave Router empty, and keep Wi-Fi on: the internet still comes over Wi-Fi.
Set up Bill&Go
- Add the printer in the console: Receipt, connected by Network, with the IP address from the self-test page.
- In the POS app on the iPad, sign in as the owner or a manager, and choose the store.
- Open Settings, then This device prints. If it is the shop’s only printing device, choose Everything for this store. Press Turn on printing.
- Allow Local Network when the iPad asks: that is how it reaches the printer.
- In the console, choose the printer under the store’s Printers → Cash drawer. See Open the cash drawer.
What to know
- An iPad or iPhone prints only while the POS app is on screen. At a counter it always is; Guided Access keeps it there.
- With QR payments on, each bill gets a KHQR with the exact amount, paid into the store’s own account.
- A card machine stays on its own, as with any POS.
- The iPad counts as one of your plan’s printing computers or boxes.
Still stuck?
Tell the Bill&Go team in Phnom Penh what you were trying to do, and we'll walk you through it.