




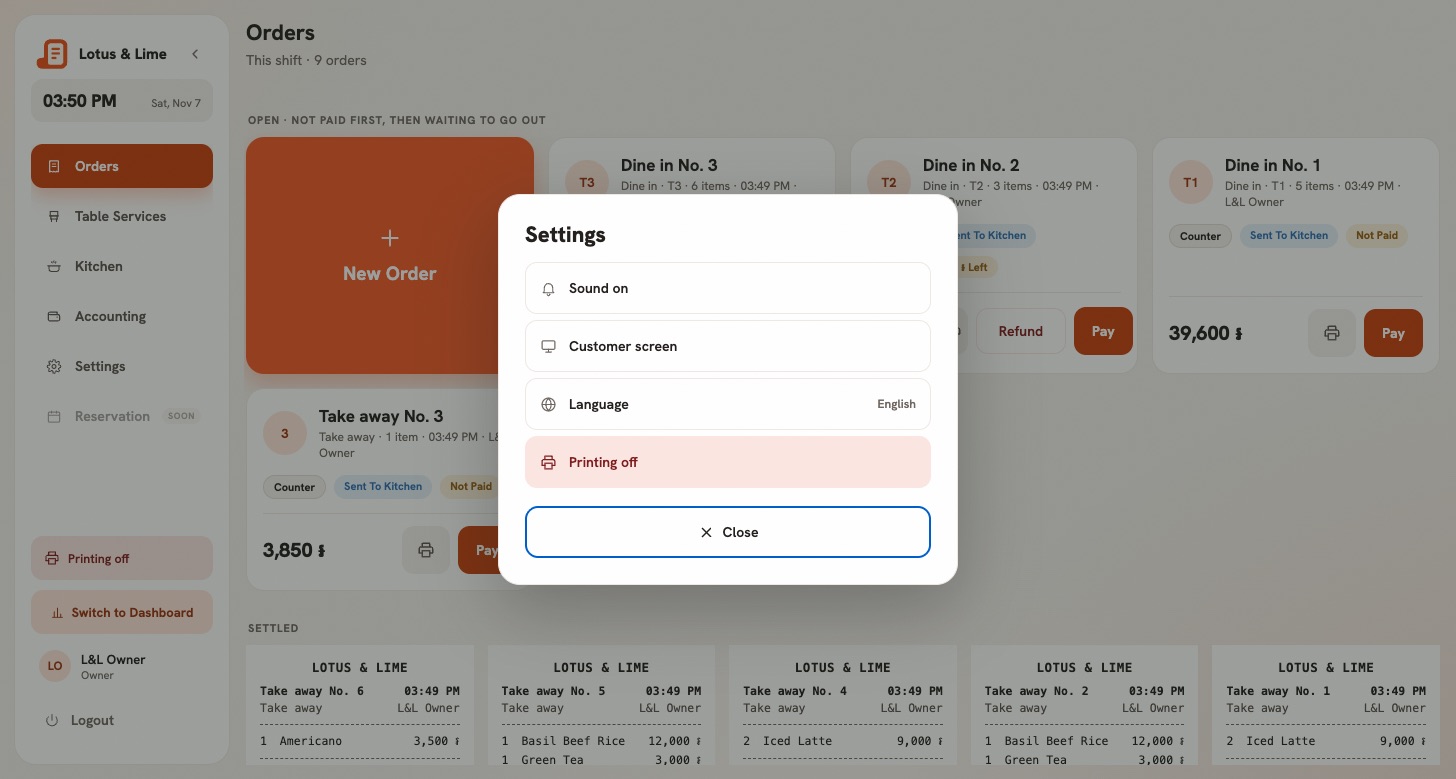
The POS Settings screen
This device’s own settings in one place: sound, printing, the customer screen, the lock, notifications and language.
- Who
- Everyone at the POS; a few rows are for the owner and managers
- Where
- POS → Settings
Settings holds what belongs to this device. The shop’s own settings stay in the console. Nothing here needs an open shift.
Find it in the POS app
- iPad: the gear at the top, beside Help.
- iPhone: under More at the top.
- Android: the gear at the top.
- Before the POS is open: a Settings button on the screen that asks you to choose a store or open the POS.
What is in it
- Sound: Chime for new orders.
- Printing: This device prints, and whether the shop is printing, which opens the printing window.
- This device: Customer screen on the second display, on Android while a second screen is there; Lock this device to the app, on Android for the owner and managers, or a line on Guided Access on an iPad or iPhone (see Lock a device); and Scale for a USB scale, on Android.
- Notifications and language: Notification settings and Language. These two are yours, not the device’s.
A switch saves the moment you flip it. This device is left out when nothing in it applies, as on a cashier’s iPhone. Send feedback and Sign out stay at the foot of Accounting.
On the web POS
Press Settings on the side rail. A window opens over the order, so nothing on screen is lost. It has Sound on or Sound off, Customer screen, Language and the printing status. While the sound is off, the Settings button shows a crossed-out bell.
Still stuck?
Tell the Bill&Go team in Phnom Penh what you were trying to do, and we'll walk you through it.